How Montessori Red Rods Help Children Learn Math Early
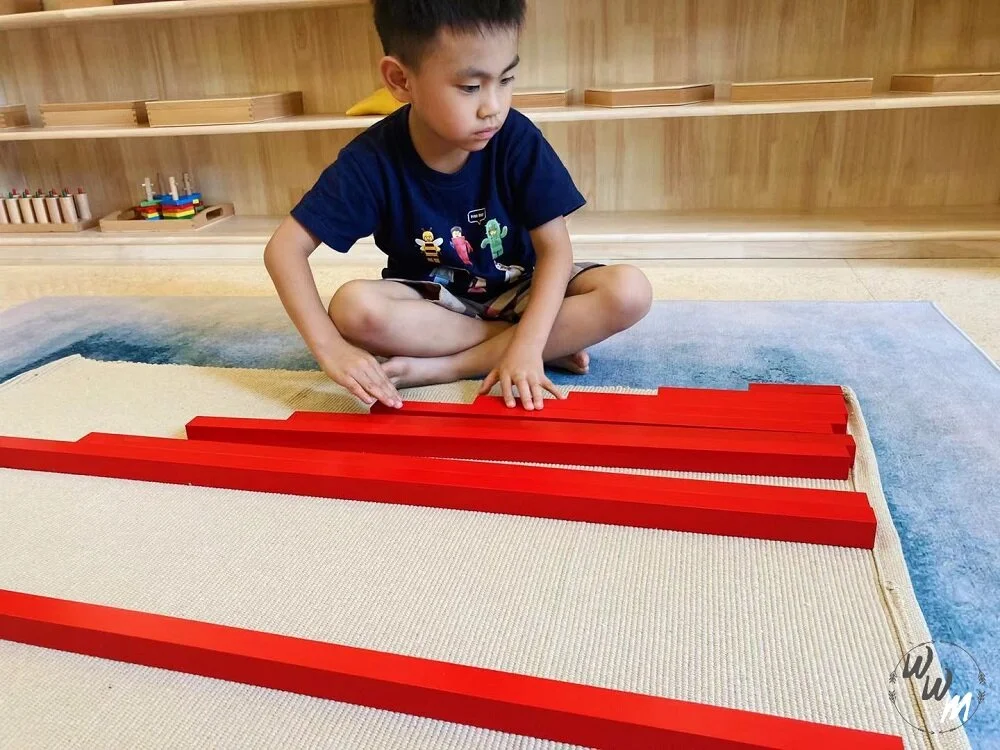
Before a child can understand that 10 is greater than 1, they need to feel it. They need to hold it, carry it, line it up, and see it take up more space in the room. This is the quiet but powerful logic behind the Montessori Red Rods — one of the earliest and most beautiful math materials in the Montessori classroom. Long before numbers are introduced, long before counting begins, the Red Rods give children a direct, physical, sensory experience of length and quantity. They are the foundation upon which all future mathematical understanding is built — and in this post, we explore exactly how and why. Whether you are a parent curious about Montessori math, an educator deepening your understanding of the materials, or someone looking to support early numeracy at home, this guide is for you. What Are Montessori Red Rods? The Montessori Red Rods are a set of ten smooth wooden rods, each painted red, that vary in length from 10 centimetres to 1 metre. The rods increase in length by equal increments of 10 centimetres — so the shortest rod is 10 cm, the next is 20 cm, the next 30 cm, and so on up to the longest rod at 100 cm (one metre). The width and height of every rod is identical — only the length changes. This elegant, uniform design is entirely intentional. Because every variable except length is controlled, the child’s attention is drawn naturally and exclusively to the one concept the material is designed to teach: length — and by extension, the mathematical idea that quantities differ in measurable, predictable ways. Design principle: In Montessori, each material isolates a single concept. The Red Rods isolate length — nothing else changes, so nothing else distracts. How Red Rods support the Montessori Curriculum The Red Rods or long rods belong to the Sensorial area of the Montessori classroom — the section dedicated to refining the child’s five senses and building the perceptual foundations of all later academic learning. They are typically introduced between the ages of two and a half and three and a half, before any formal numeracy work begins. The Red Rods sit alongside other beloved sensorial materials — the Pink Tower, the Brown Stair, the Colour Tablets, the Sound Cylinders — each of which isolates a different quality: size, dimension, colour, sound. Together, these materials build what Montessori called the mathematical mind — a mind naturally attuned to precision, order, pattern, and measurement. The Red Rods are also the direct sensorial precursor to the Number Rods — the material through which quantities and numerals are first formally linked. A child who has worked thoroughly with the Red Rods arrives at the Number Rods with a fully prepared body and mind. What Do Red Rods Actually Teach? At first glance, the Red Rods might seem too simple — just ten rods of different lengths. But in the hands and mind of a young child, they quietly lay down some of the most important mathematical foundations of all. 1.What Do Red Rods Actually Teach? This seems obvious — but it is not. Many children arrive at school able to recite numbers without understanding what quantity really means. The Red Rods make length physical and real. The child does not learn that the longest rod is ‘big’ in an abstract sense — they carry it across the room, feel its weight and unwieldiness, and understand bigness in their body 2.Comparative Language and Reasoning Working with the Red Rods naturally invites the language of comparison: longer, shorter, longest, shortest, the same as, more than, less than. These are not just vocabulary words — they are the building blocks of mathematical reasoning. A child who can confidently compare, order, and describe lengths is thinking mathematically, even before they have touched a number. 3. Seriation — Ordering by Gradation When a child arranges the ten rods in order from shortest to longest (or longest to shortest), they are practising seriation — the ability to arrange objects along a continuum. Seriation is a foundational cognitive skill identified by Jean Piaget as essential for later mathematical thinking, particularly for understanding number sequences and the number line. 4. Concentration and Order Working with the Red Rods requires the child to carry each rod carefully (some are heavy and long), arrange them precisely, and return them to the mat or shelf in order. This builds concentration, physical coordination, and the Montessori quality of normalisation — that calm, focused, purposeful engagement that is the hallmark of a prepared child. How to Present the Red Rods: A Step-by-Step Guide The Red Rods are introduced through a simple, three-stage lesson that follows the natural Montessori presentation method. As with all Montessori lessons, the emphasis is on minimal language, clear demonstration, and allowing the child to discover rather than be told. Before You Begin Choose a large floor mat or a clear area of floor — the rods need space Bring the rods one at a time from the shelf to the mat, laying them randomly Sit beside the child, not across from them Stage One — Exploration Before imposing any structure, allow the child to freely handle the rods. Let them carry them, feel the difference in weight, notice which is long and which is short. This free exploration is not wasted time — it is essential preparation. Stage Two — Ordering Begin with just three rods — the shortest, the longest, and one in the middle. Demonstrate finding the longest: run your hand along several rods, pause, and place the longest at the top of the mat. Then find the next longest and place it below. Invite the child to continue. Gradually expand to all ten rods as the child gains confidence. Stage Three — Language and Three-Period Lesson Once the child can order the rods reliably, introduce comparative language using the Three-Period Lesson: ‘This is the longest rod. This is the shortest rod. Show me the longest. Show me
Montessori Sandpaper Letters
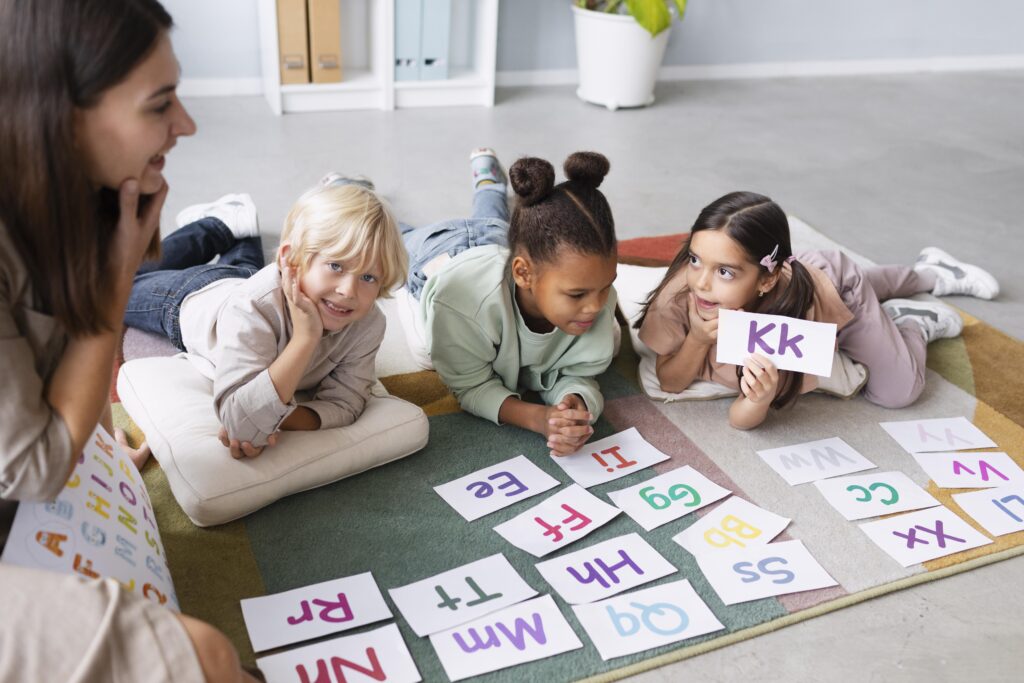
Best Montessori Learning Material At Home Close your eyes for a moment and imagine tracing your finger along the raised, rough surface of a letter. You feel its curves, its angles, the direction it travels. Now imagine doing that dozens of times, day after day, with no pressure — only curiosity and the simple pleasure of touch. By the time you sit down to write that letter, your hand already knows the way. This is the quiet genius of the Montessori Sandpaper Letters — one of the most beloved and effective materials in early childhood education. Simple in appearance, profound in impact, these rough-textured letter tiles have helped generations of children unlock the mysteries of reading and writing in a way that feels entirely natural, unhurried, and joyful. In this blog post, we explore what Sandpaper Letters are, the science behind why they work so powerfully, how to use them at home, and what to expect as your child moves through this remarkable journey to literacy. What Are Sandpaper Letters? Sandpaper Letters are a set of wooden tiles, each featuring a single letter of the alphabet cut out of fine sandpaper and mounted onto a smooth wooden or board background. The consonants are traditionally mounted on blue (or pink) boards and the vowels on red (or pink) boards — a colour distinction that will later help children understand the difference between vowel and consonant sounds. The letters are always presented in their cursive or print form — depending on the school’s approach — and they represent sounds, not letter names. This is a crucial distinction that sets Montessori literacy apart from traditional phonics instruction. Important note: In Montessori, we teach the sound of the letter first — not its name. The letter ‘s’ is introduced as the sound ‘sss’, not as ‘ess’. This makes the leap to blending sounds into words far more intuitive for the child. The Science Behind the Sandpaper Letters Why sandpaper? Why not simply show a child a printed letter on a flashcard or a screen? The answer lies in how the young brain learns — and in particular, how multi-sensory experiences create stronger, more durable memory traces than single-sense experiences. The Three-Pathway Approach Sandpaper Letters engage three distinct learning pathways simultaneously: Visual — the child sees the shape of the letterAuditory — the child hears the sound of the letter from the teacher or parentTactile-Kinesthetic — the child traces the letter with their fingers, feeling its shape and direction When all three pathways fire at the same time, the brain forms a much richer, more deeply encoded memory of the letter. Neuroscientists call this multi-modal encoding — and research consistently shows it produces superior retention compared to single-modal learning. A child who has traced the letter ‘s’ with their fingers thirty times does not need to think about how to write it. The motor memory is already in the hand. The body knows. Muscle Memory and the Writing Hand Every time a child traces a Sandpaper Letter, they are rehearsing the exact motor pattern required to write that letter. The direction, the pressure, the flow — all of it is being deposited into muscle memory long before a pencil is ever introduced. This is why Montessori children often begin writing before they begin reading — a sequence that surprises many parents but makes complete neurological sense. The hand has been preparing quietly all along. Phonemic Awareness Through Sound Alongside the physical tracing, the child hears and repeats the phonetic sound of the letter. This builds phonemic awareness — the ability to hear, identify, and manipulate individual sounds in language — which decades of reading research identifies as the single strongest predictor of early reading success. By connecting sound, sight, and touch simultaneously, the Sandpaper Letters lay a triple foundation for literacy that is both scientifically sound and developmentally appropriate. When to Introduce Sandpaper Letters Most children are ready to begin working with Sandpaper Letters between the ages of three and four, though as with all Montessori materials, the child’s readiness is the true guide — not their age. Signs that your child may be ready include: Showing interest in books, stories, and print in the environment Asking questions about letters or words they see around them Able to sit quietly and focus on a task for several minutes Has developed a good three-finger (pincer) grip through practical life and sensorial work Showing interest in drawing, mark-making, or writing-like activities It is perfectly normal for some children to show readiness at two and a half, and others not until four or five. Both are entirely healthy. Montessori is not a race — it is a journey taken at each child’s own pace. How to Present Sandpaper Letters: The Three-Period Lesson The Sandpaper Letters are introduced using Dr. Montessori’s Three-Period Lesson — a beautifully simple teaching sequence that moves from introduction to recognition to recall. Introduce only two or three letters at a time, beginning with sounds that are phonetically distinct and appear frequently in simple words — such as ‘s’, ‘m’, and ‘a’. Step 1: The First Period — Introduction Hold up the Sandpaper Letter and say the sound clearly and naturally: ‘This is sss.’ Trace the letter with two fingers (index and middle) in the direction of writing, and invite the child to do the same while you repeat the sound together. Step 2: The Second Period — Recognition Lay out two or three letters the child has been introduced to and ask: ‘Can you show me sss?’ The child points to or picks up the correct letter. Vary the activity — ‘Can you put sss on your head? Can you trace sss on the floor?’ Step 3: The Third Period — Recall Point to a letter and ask: ‘What sound is this?’ If the child recalls correctly, celebrate! If not, simply return to Period One — there is no failure, only more time needed. Remember: Keep sessions short, light, and joyful. Five