My Child Won’t Share and Hides

Behind My Legs at Parties — Is Something Wrong? A Warm, Honest Guide for Parents of Shy Children and Reluctant Sharers | kiransaifmontessori.com The birthday party is in full swing. Every other child is running, shouting, grabbing cake, and making instant friends. Your child is pressed firmly against your leg, face buried in your side, absolutely certain they are not coming out until it is time to go home. Later, at the park, another child reaches for your toddler’s favourite digger. Your child snatches it back so fast it makes everyone flinch. No negotiation. No warning. Just a very clear: that is mine. You smile apologetically at the other parent, feel the familiar mix of embarrassment, worry, and love and wonder — is my child okay? Is something wrong? Should I be doing something differently? Here is the answer, and it is a good one: almost certainly, no. Both of these behaviours — shyness in social situations and reluctance to share — are completely normal parts of child development. They are not character flaws. They are not signs of bad parenting. They are signs of a child who is developmentally right on track. But normal does not mean you cannot help. And that is exactly what this guide is for. How to Help a Shy Child Build Confidence First — What Is Shyness, Really? Shyness is not a personality defect. It is not a sign that something has gone wrong. It is a temperament trait — a way of being in the world that some children are simply born with. Researchers estimate that around 15 to 20 percent of children are born with what psychologist Jerome Kagan called a ‘behaviourally inhibited’ temperament — meaning they are naturally more cautious, more sensitive to new stimuli, and slower to warm up to unfamiliar people and situations. This is biological. It is not something you caused. It is not something your child can simply choose to switch off. And crucially — it is not something that needs to be fixed. Shy children grow into thoughtful, perceptive, deeply empathetic adults who notice things that others miss and build fewer but profoundly deeper relationships. What parents can do is not eliminate shyness — but help their child move through it with confidence rather than being paralysed by it. There is a big difference between a shy child who feels supported and a shy child who feels ashamed of who they are. 🔬 Research Note: Studies by Dr. Jerome Kagan at Harvard found that while temperament is largely inborn, the environment makes an enormous difference to how it plays out. Shy children with warm, supportive, non-pressuring parents develop much better social outcomes than shy children who are pushed, labelled, or made to feel their shyness is a problem. The Things We Say That Make Shyness Worse Before we talk about what helps, let’s talk about what does not — because many of the instinctive things parents say in social situations can unintentionally make a shy child’s experience harder, not easier 😬 At a family gathering when a relative says hello ❌ What NOT to do: Pushing them forward: ‘Go on, say hello! Don’t be rude!’ or labelling them to the relative: ‘She’s shy, sorry.’ ✅ What works instead: Crouch down to your child’s level and say quietly: ‘It’s okay to feel shy. Take your time. I’m right here.’ Let them watch from the safety of your side until they are ready. Most shy children will engage — on their own timeline. 🌿 Montessori note: In Montessori we call this the sensitive period for warming up. Every child has their own pace of engagement with new people. Rushing it or shaming it does not accelerate it — it entrenches it. 🎂 At a birthday party where your child won’t join in ❌ What NOT to do: Separating from them before they are ready: ‘Go and play! You’ll be fine!’ or comparing them: ‘Look how all the other children are playing nicely.’ ✅ What works instead: Stay nearby and give a running, calm commentary: ‘There’s a sandpit over there. There’s a girl with a red dress building something.’ Let curiosity do the work. Do not push. When they are ready — and they usually are within 20 to 30 minutes — they will move toward the activity on their own. 🌿 Montessori note: The Montessori prepared environment principle applies here too. A warm, predictable, low-pressure social setting where a child can observe before participating is the ideal environment for a shy child to flourish. 🧒 When another adult asks your child a direct question ❌ What NOT to do: Answering for them immediately or pressuring: ‘Answer Aunty! Tell her your name!’ ✅ What works instead: Give your child a moment of silence — longer than feels comfortable. If they genuinely cannot respond, say gently: ‘He knows his name. He might need a moment.’ Then move the conversation on. Never answer for them unless they have clearly indicated they want you to. 🌿 Montessori note: Answering for a child repeatedly teaches them that they do not need to speak for themselves — which is the opposite of the independence and confidence we are trying to build 10 Gentle Ways to Help a Shy Child Build Real Confidence These are not tricks or hacks. They are genuine, research-informed, Montessori-aligned approaches that build confidence from the inside out — not a performance of confidence that falls apart when the pressure is on. Never Label Them as Shy — In Front of Them or Anyone Else The moment you say ‘she’s shy’ in front of your child, you have given them a story about themselves that they will carry and live up to. Children become what we name them. Instead of ‘she’s shy’, try ‘she takes a little time to warm up — she’ll get there.’ That is a story about a process, not a permanent identity. It leaves the door open. Try saying: “She is still getting comfortable. Give
What Skills Should a 5-Year-Old Have Before Starting School?
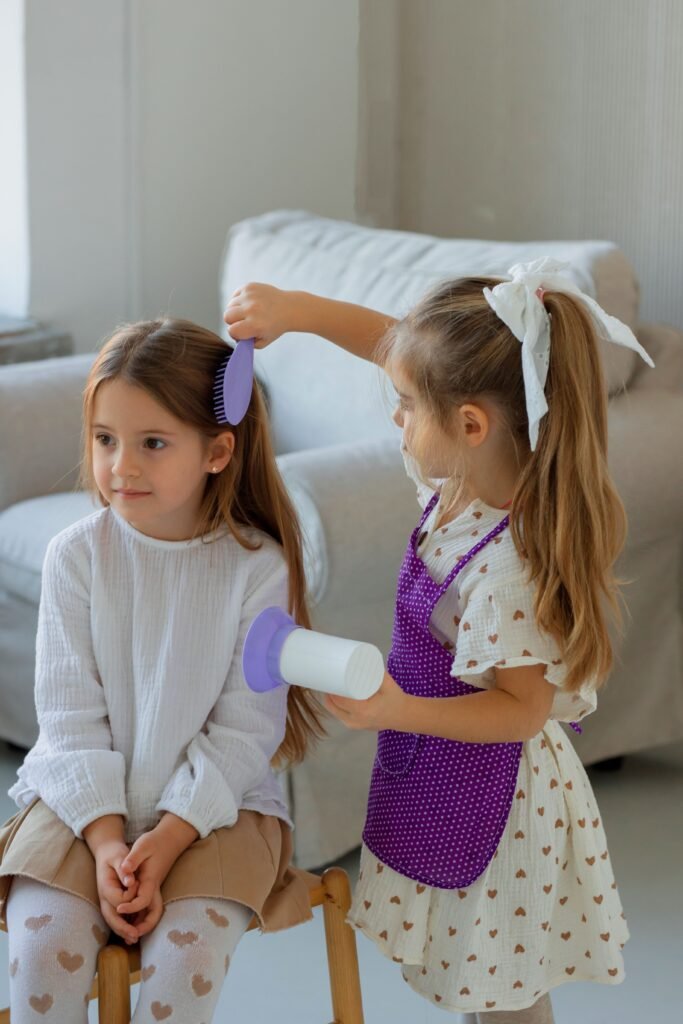
A Complete School Readiness Guide for Parents — With Checklist, Tips, and the Montessori Approach By Kiran Saif | Certified Montessori Educator | kiransaifmontessori.com The school bag is bought, uniform is ready and the name labels are sewn in. And somewhere between the excitement of the new pencil case and the quiet of the evening, a question surfaces that almost every parent of a nearly-five-year-old carries: is my child actually ready for this? Not ready in the sense of having the right stationery. Ready in the sense that matters — emotionally, socially, academically, practically. Ready to sit in a group, to follow instructions from an unfamiliar adult, to manage their own lunchbox, to handle the feelings that come with a new and demanding environment. This guide answers that question thoroughly and honestly. As a certified Montessori educator who has prepared hundreds of children for the school transition, I can tell you this: the skills that matter most before school are not the ones most parents worry about. And the skills most parents overlook are the ones that make the biggest difference on day one. Let us go through all of them — with practical signs of readiness, tips for building each skill at home, and the honest reassurance that most five-year-olds are more ready than their parents believe. Before We Begin — A Word About Readiness School readiness is not a fixed checklist that your child either passes or fails. It is a profile — a collection of developing skills, some stronger than others, that together give a child the foundations to thrive in a school environment. No five-year-old arrives at school with every skill perfectly in place. That is not the expectation — and if any teacher or school suggests it is, they have misunderstood child development. The expectation is that your child has enough foundation across enough areas to begin — and that the school environment will continue to build on that foundation. 💛 The Most Reassuring Truth: Research consistently shows that a child’s readiness to learn is more important than what they already know. A curious, confident, emotionally regulated five-year-old who cannot yet read will outperform an anxious, academically drilled child who can recite letters but struggles to manage their feelings in a group setting. The 8 Key Skill Areas — What Schools Actually Look For 💬 1. Language and Communication Skills The ability to communicate — to express needs clearly, to listen and follow instructions, to ask for help when confused — is perhaps the single most important school readiness skill there is. A child who cannot yet say ‘I don’t understand’ or ‘I need to use the toilet’ will struggle regardless of their academic ability. Communication is the tool through which everything else in a classroom happens. Signs of readiness: Can speak in full sentences of 5+ words. Asks questions. Answers questions about a story. Can tell an adult what they need. Listens when spoken to and waits their turn in a conversation. How to help at home: Talk with your child constantly — at mealtimes, on walks, during play. Ask open questions: ‘What do you think will happen next?’ Read aloud every day and discuss the story. Play ‘show and tell’ at home so they practise speaking to an audience. 😊 2. Emotional Regulation — Managing Big Feelings This is the skill most parents underestimate and most teachers desperately wish more children arrived with. A classroom of twenty-five five-year-olds is a high-stimulation, high-demand environment. Children who can manage frustration, wait their turn without melting down, recover from disappointment, and express their feelings in words rather than actions will have a dramatically easier first year than those who cannot. Signs of readiness: Can wait for a few minutes without becoming distressed. Recovers from upsets within a reasonable time. Can say ‘I am angry’ or ‘I am sad’ instead of immediately hitting or crying. Accepts ‘no’ without a prolonged meltdown most of the time. How to help at home: Name emotions in daily life: ‘You look frustrated. That puzzle is tricky, isn’t it?’ Validate feelings before solving problems. Read books about characters who experience and manage big emotions. Practice the pause — ‘Let’s take three big breaths’ — so it becomes a familiar strategy. 👥 3. Social Skills — Getting Along with Others For most children, school is the first environment in which they must navigate a large group of peers without a parent nearby. The social demands are significant: taking turns, sharing resources, joining a group already at play, resolving disagreements, following group rules, and making and maintaining friendships. These skills are built over years of social experience — not drilled in the weeks before school starts. Signs of readiness: Can play cooperatively with at least one other child. Takes turns without major conflict. Can say ‘can I play?’ and accept ‘not right now’ without falling apart. Understands basic rules of a group game. Can disagree without becoming aggressive. How to help at home: Arrange regular playdates with same-age peers before school starts. Let children resolve minor conflicts without adult intervention — they need practise. Enrol in a group activity — swimming, gymnastics, art class — where following group instruction is practised in a safe environment. 🖊️ 4. Early Literacy — Language Foundations for Reading Here is what many parents get wrong: reading readiness is not about knowing the alphabet by rote or being able to spell your name. It is about phonemic awareness — the ability to hear individual sounds within words. A child who can hear that ‘cat’ has three sounds (c-a-t), who knows that ‘ball’ and ‘bat’ start with the same sound, who can clap the syllables in their name — that child is genuinely ready for reading instruction. A child who can recite A-Z but has no phonemic awareness is not. Signs of readiness: Recognises their own name in writing. Shows interest in books and print in the environment. Can hear and produce rhymes. Can clap syllables in simple words.
Top 10 Montessori Materials Every Home Classroom Needs in 2026
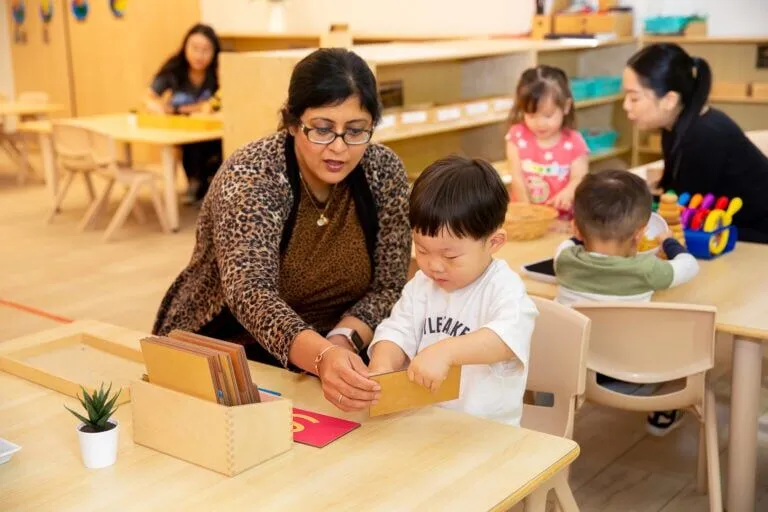
Affiliate Disclosure: {As an Amazon Associate, I earn from qualifying purchases at no additional cost to you} The Struggle Is Real — And You’re Not Alone You open Amazon, type ‘Montessori toys,’ and suddenly you’re drowning in brightly coloured plastic sets with the word ‘Montessori’ plastered across the box like a magic badge. Some are $8.99. Some are $89.99. And almost none of them actually follow the Montessori method. As a certified Montessori educator with years of experience in the classroom and in supporting families at home, I see this confusion every single week. Parents who want to do right by their children, who’ve read about Montessori and felt inspired — but who have no idea which materials are the real deal and which are clever marketing dressed up in wooden packaging. So I created this guide for you. I’ve vetted, tested, and used every category of material on this list. These are the top 10 authentic, durable, and purposeful Montessori materials available on Amazon right now — the ones that actually follow the philosophy, build the skills, and stand the test of time. ⚡ Quick Picks — Top 3 if You’re Skimming: Pink Tower (Sensorial) — the single most iconic Montessori material; mathematical preparation disguised as beautiful play Sandpaper Letters (Language) — the gateway to reading and writing; multi-sensory, non-negotiable Knobbed Cylinders (Fine Motor + Sensorial) — builds the writing grip years before a pencil is introduced 🔗 Internal Link: Browse our full Montessori Learning Toys collection at kiransaifmontessori.com for more curated recommendations The Pink Tower (Sensorial Development) → Check the current price of our favourite Wooden Pink Tower on Amazon Why It’s Essential The Pink Tower is the most recognised Montessori material in the world — and for good reason. It consists of ten pink wooden cubes, ranging from 1 cm³ to 10 cm³, each differing by exactly one cubic centimetre. The child’s task is to build a tower from largest to smallest — and then knock it down and start again. But here’s what most parents don’t know: the Pink Tower is not just a stacking toy. It is a precise mathematical preparation. The cubes increase in a fixed ratio, introducing the child’s hands and eyes to the concept of the cube of a number — 1³, 2³, 3³ — years before they will ever write that notation. This is the Montessori method at its finest: abstract mathematics taught through the body. ✏️ Expert Tip: The Pink Tower is used in combination with the Brown Stair (Item 4 below). When used together, they prepare the child for three-dimensional spatial reasoning and early geometry. What to Look For on Amazon Solid, untreated or non-toxic painted wood — no MDF or hollow centres Cubes that are precisely sized — even a 1–2mm error disrupts the learning Weight: the smallest cube should feel noticeably lighter than the largest No plastic components #2 — Object Permanence Box (Infant / Toddler) Why It’s Essential The Object Permanence Box is one of the earliest Montessori materials — typically introduced between 6 and 12 months of age. It teaches one of the most profound early cognitive lessons: that objects continue to exist even when they are out of sight. Jean Piaget identified object permanence as a milestone cognitive achievement of infancy. The Montessori Object Permanence Box creates a purposeful, repeated activity around this concept: the child drops a ball through a hole, watches it disappear, and then sees it reappear through a drawer. Each repetition deepens the neural pathway and satisfies the infant’s drive to understand cause and effect. 🌿 Affiliate Angle: When shopping on Amazon, always filter for ‘Natural Wood’ and ‘Non-Toxic Finish.’ Infants mouth everything — the materials they work with must be absolutely safe. Look for products with CE certification or ASTM compliance listed in the product description. Choose solid wood over MDF or plywood — it lasts longer and feels better The ball should be wooden, not rubber or plastic The drawer mechanism should slide smoothly — frustration-free for small hands No paint on the ball — natural finish only for infants 🛒 Shop Now: → Find Non-Toxic Wooden Object Permanence Boxes on Amazon 🛒 Shop Now: → Find Non-Toxic Wooden Object Permanence Boxes on Amazon #3 — Child-Sized Practical Life Cleaning Set Why Functional Work Is the Heart of Montessori Many parents are surprised to learn that one of the most important areas of the Montessori classroom is Practical Life — not maths, not language, but the everyday work of caring for oneself and one’s environment. Sweeping, mopping, wiping tables, washing dishes, folding cloth — these are not chores imposed on children. They are deeply purposeful activities that build concentration, coordination, independence, and a profound sense of belonging. A child-sized wooden broom and mop set is one of the best Amazon finds for Montessori parents. When a child has their own real tools — proportioned for their body, made of natural materials, genuinely functional — they engage with the work seriously and with enormous pride. Plastic imitations miss the point entirely. 💡 Montessori Principle: Children want to participate in real life, not pretend life. A toy broom teaches nothing. A real child-sized broom teaches responsibility, motor coordination, and the joy of contributing to the family. Look for natural wood handles — no plastic Broom bristles should be natural fibre or soft synthetic — functional, not decorative Set should include at minimum: broom, dustpan, and mop or floor cloth Height should be proportionate — when standing, the handle reaches the child’s shoulde 🛒 Shop Now: → Check Price Of High-Quality Wooden Child-Sized Cleaning Sets on Amazon Items 4–7: The Learning Core These four materials form the backbone of the Montessori sensorial and language curriculum. If you’re building a home Montessori environment, these are non-negotiable — and together, they cover fine motor, visual discrimination, geometry, language preparation, and early literacy. #4 — Brown Stairs (Broad Stair) The Brown Stair consists of ten brown wooden prisms,
Montessori Preschool Workbook
Build Early Learning, Writing & Thinking Skills at Home 🌟 Looking for a Complete Learning Book for Your Child? If you want a structured yet fun way to introduce learning, this Montessori Preschool Workbook is a great starting point. It combines multiple activities to help children learn writing, tracing, numbers, and problem-solving in one place. Check Price on Amazon What is this Workbook? This is an all-in-one preschool activity book designed for early learners. It includes: Letter tracing Number practice Shapes and patterns Problem-solving activities Who is it for? Children aged 3–5 years Preschool & kindergarten learners Parents starting early education at home. “Pre-school XXL – Montessori Method” of Montessori Lab offers more than 200 educational and entertaining activities for your kids from 3 to 6. With this book, your children will learn to trace, count, cut out and more, developing fundamental skills such as perception of size and distances, understanding of time, seasons and places. The book, of over 150 pages, is designed to allow your children to discover and learn new skills on their own, with you as guides where needed, following the principles of the Montessori method. Key Benefits ✔ Improves Writing Skills Helps children practice letter formation and pencil control. ✔ Builds Early Math Understanding Introduces numbers, counting, and patterns. ✔ Encourages Independent Learning Children can complete activities on their own. ✔ Boosts Cognitive Development Enhances memory, logic, and problem-solving. Here are just a few of the many activities, concepts and skills your child will learn if you purchase: ✅ Let’s discover the world by learning! Seasons, routines, transportation, animals and more! ✅ Coloring to learn shapes and figures together ✅ Approaching numbers and letters by tracing mazes, paths and more – Holding a pencil and writing independently and engagingly ✅ Letters and words: playing you learn! ✅ Develops creativity and the artistic side: Origami to cut out ✅ And much, much more! Why It Works Montessori-style workbooks focus on: Step-by-step learning Repetition for mastery Simple and clear activities How to Use Start with 1–2 pages daily Sit with your child initially Let them try independently Praise effort, not perfection Before You Buy Age-appropriate content Clear and simple design Durable pages Pros & Cons Pros All-in-one learning Easy to follow Great for home learning Cons Not reusable Needs supervision initially. Check latest price on Amazon Final Verdict A great choice for parents who want a structured learning tool without overwhelming their child. BONUS: 100 Montessori Flashcards to print, an excellent resource for learning to recognize early words and match them with pictures, developing logic and reading learning.
How Montessori Red Rods Help Children Learn Math Early
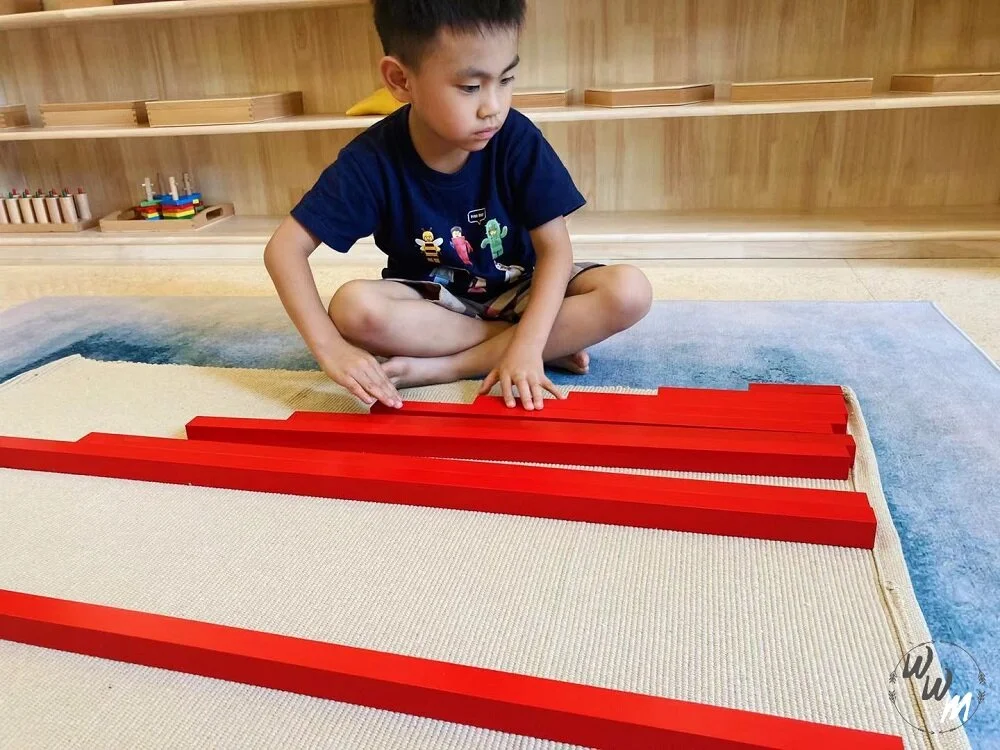
Before a child can understand that 10 is greater than 1, they need to feel it. They need to hold it, carry it, line it up, and see it take up more space in the room. This is the quiet but powerful logic behind the Montessori Red Rods — one of the earliest and most beautiful math materials in the Montessori classroom. Long before numbers are introduced, long before counting begins, the Red Rods give children a direct, physical, sensory experience of length and quantity. They are the foundation upon which all future mathematical understanding is built — and in this post, we explore exactly how and why. Whether you are a parent curious about Montessori math, an educator deepening your understanding of the materials, or someone looking to support early numeracy at home, this guide is for you. What Are Montessori Red Rods? The Montessori Red Rods are a set of ten smooth wooden rods, each painted red, that vary in length from 10 centimetres to 1 metre. The rods increase in length by equal increments of 10 centimetres — so the shortest rod is 10 cm, the next is 20 cm, the next 30 cm, and so on up to the longest rod at 100 cm (one metre). The width and height of every rod is identical — only the length changes. This elegant, uniform design is entirely intentional. Because every variable except length is controlled, the child’s attention is drawn naturally and exclusively to the one concept the material is designed to teach: length — and by extension, the mathematical idea that quantities differ in measurable, predictable ways. Design principle: In Montessori, each material isolates a single concept. The Red Rods isolate length — nothing else changes, so nothing else distracts. How Red Rods support the Montessori Curriculum The Red Rods or long rods belong to the Sensorial area of the Montessori classroom — the section dedicated to refining the child’s five senses and building the perceptual foundations of all later academic learning. They are typically introduced between the ages of two and a half and three and a half, before any formal numeracy work begins. The Red Rods sit alongside other beloved sensorial materials — the Pink Tower, the Brown Stair, the Colour Tablets, the Sound Cylinders — each of which isolates a different quality: size, dimension, colour, sound. Together, these materials build what Montessori called the mathematical mind — a mind naturally attuned to precision, order, pattern, and measurement. The Red Rods are also the direct sensorial precursor to the Number Rods — the material through which quantities and numerals are first formally linked. A child who has worked thoroughly with the Red Rods arrives at the Number Rods with a fully prepared body and mind. What Do Red Rods Actually Teach? At first glance, the Red Rods might seem too simple — just ten rods of different lengths. But in the hands and mind of a young child, they quietly lay down some of the most important mathematical foundations of all. 1.What Do Red Rods Actually Teach? This seems obvious — but it is not. Many children arrive at school able to recite numbers without understanding what quantity really means. The Red Rods make length physical and real. The child does not learn that the longest rod is ‘big’ in an abstract sense — they carry it across the room, feel its weight and unwieldiness, and understand bigness in their body 2.Comparative Language and Reasoning Working with the Red Rods naturally invites the language of comparison: longer, shorter, longest, shortest, the same as, more than, less than. These are not just vocabulary words — they are the building blocks of mathematical reasoning. A child who can confidently compare, order, and describe lengths is thinking mathematically, even before they have touched a number. 3. Seriation — Ordering by Gradation When a child arranges the ten rods in order from shortest to longest (or longest to shortest), they are practising seriation — the ability to arrange objects along a continuum. Seriation is a foundational cognitive skill identified by Jean Piaget as essential for later mathematical thinking, particularly for understanding number sequences and the number line. 4. Concentration and Order Working with the Red Rods requires the child to carry each rod carefully (some are heavy and long), arrange them precisely, and return them to the mat or shelf in order. This builds concentration, physical coordination, and the Montessori quality of normalisation — that calm, focused, purposeful engagement that is the hallmark of a prepared child. How to Present the Red Rods: A Step-by-Step Guide The Red Rods are introduced through a simple, three-stage lesson that follows the natural Montessori presentation method. As with all Montessori lessons, the emphasis is on minimal language, clear demonstration, and allowing the child to discover rather than be told. Before You Begin Choose a large floor mat or a clear area of floor — the rods need space Bring the rods one at a time from the shelf to the mat, laying them randomly Sit beside the child, not across from them Stage One — Exploration Before imposing any structure, allow the child to freely handle the rods. Let them carry them, feel the difference in weight, notice which is long and which is short. This free exploration is not wasted time — it is essential preparation. Stage Two — Ordering Begin with just three rods — the shortest, the longest, and one in the middle. Demonstrate finding the longest: run your hand along several rods, pause, and place the longest at the top of the mat. Then find the next longest and place it below. Invite the child to continue. Gradually expand to all ten rods as the child gains confidence. Stage Three — Language and Three-Period Lesson Once the child can order the rods reliably, introduce comparative language using the Three-Period Lesson: ‘This is the longest rod. This is the shortest rod. Show me the longest. Show me
How to Create a Montessori-Inspired Home Education Environment
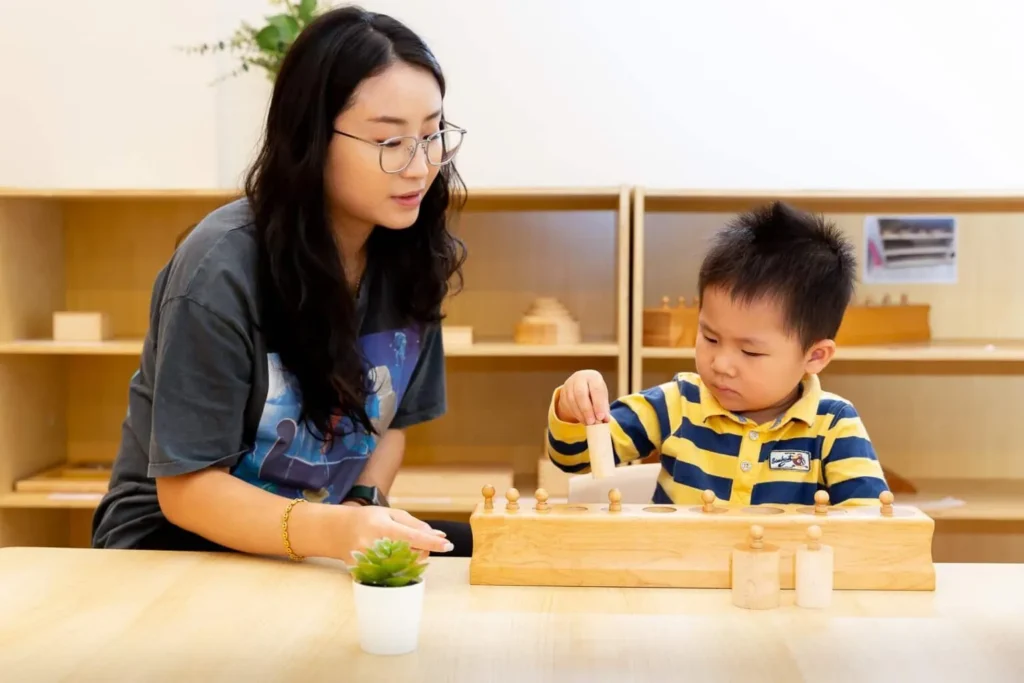
You don’t need to enroll your child in a Montessori school to give them a Montessori education. Some of the most powerful Montessori learning happens not in a classroom, but at home — in the kitchen, in the bedroom, in the garden, in the simple rhythms of daily family life. Creating a Montessori-inspired home environment is not about buying expensive materials or redesigning every room. It is about a shift in perspective — seeing your home through your child’s eyes and asking: does this space help my child feel capable, independent, and respected? In this blog post, we walk you through the core principles of a Montessori home environment and give you practical, room-by-room guidance on how to bring those principles to life — whatever your budget, whatever your space. The Core Principles of a Montessori Home Before we get into the practicalities, it helps to understand the philosophy behind the Montessori home environment. Dr. Maria Montessori spoke often about the prepared environment — a space consciously arranged to support the child’s independence, development, and natural curiosity. Every element of that environment sends a message to the child. The question is: what message do we want to send? A Montessori home environment is guided by five core principles: Independence The environment is arranged so that the child can do as much as possible for themselves — without waiting for adult help. Low shelves, child-sized furniture, accessible materials, and reachable hooks all say to the child: you are capable; this is your space too. Order Young children thrive on order. It is not simply a preference — it is a developmental need. During the sensitive period for order (roughly ages one to three), children find deep comfort and security in a predictable, well-organised environment. In a Montessori home, everything has a place, and that place is consistent. Beauty and Simplicity A Montessori environment is beautiful but uncluttered. Rather than overwhelming the child with dozens of toys and stimuli, the Montessori home offers fewer, more carefully chosen materials — each one worthy of the child’s attention. Natural materials, soft colours, and real objects are preferred over plastic and synthetic alternatives.One of the best choice for this beautiful experience is Ks montessorri kitchen set Freedom Within Limits Children are free to explore, choose their activities, and move through the home — within clear, consistent boundaries. The environment itself defines those limits, so the adult does not need to be constantly redirecting or correcting. A well-prepared home environment reduces conflict and increases harmony. Adena Montessori Color Tablets provide a learning and joyful environmet for kids at home. Connection to Real Life Montessori children are not kept separate from the real work of the household. They participate in cooking, cleaning, caring for plants and animals, and managing their own belongings. This participation is not a burden — it is a profound source of purpose, competence, and belonging. Room by Room: Setting Up Your Montessori Home The Child’s Bedroom The bedroom is the child’s most personal space — and the place where independence begins each morning and ends each night. A few thoughtful adjustments can transform it into a true Montessori sanctuary. The Floor Bed One of the most distinctive features of a Montessori bedroom is the floor bed — a mattress placed directly on the floor, or a very low bed frame, so the child can get in and out independently from the earliest months of life. Rather than being lifted in and out of a cot by an adult, the child develops autonomy over their own sleep space from the very beginning. This is not only about independence — it also gives the child the freedom to explore their room safely during the natural moments of wakefulness that occur throughout the night, without distress or danger. A Low, Open Wardrobe Hanging clothes and folded items at the child’s eye level and reach allows them to choose their own outfit and dress themselves — a practical life milestone that builds confidence, fine motor skills, and a sense of personal identity. Limit the choices to two or three options per day to make decision-making manageable The Kitchen The kitchen is arguably the richest Montessori learning environment in the home — and one that most families have never thought of this way. Cooking involves maths, science, language, practical life skills, sensorial exploration, and above all, the deep satisfaction of contributing to family life. A Learning Tower or Step Stool A sturdy step stool or learning tower brings the child to counter height, allowing them to participate safely in food preparation alongside an adult. Even a two-year-old can wash vegetables, tear salad leaves, stir batter, or pour water — all meaningful, developmentally rich tasks. A Low Snack Station Dedicate a low shelf or drawer in the kitchen to the child’s snacks and drinking water. A small pitcher, a glass, a plate, and a few healthy snack options allow the child to serve themselves independently when they are hungry — building body awareness, self-regulation, and confidence. Child-Sized Real Tools Invest in a small set of real — not plastic — child-sized kitchen tools: a blunt spreading knife, a vegetable peeler, a small chopping board, a grater. Children know the difference between real and pretend, and real tools communicate trust and respect. Used under appropriate supervision, they are safe and deeply satisfying. A Place for Cleaning Up Keep a small dustpan and brush, a child-height mop, and a cloth at accessible levels. Spills are learning opportunities — and a child who can clean up after themselves feels enormously capable. Resist the urge to swoop in and clean for them. The Living and Play Area The main living space of the home is where much of the child’s free exploration and play will take place. The Montessori approach transforms this area from a place where the child plays while adults watch, into a shared space where the child is a genuine participant. The Yes Space
Montessori Sandpaper Letters
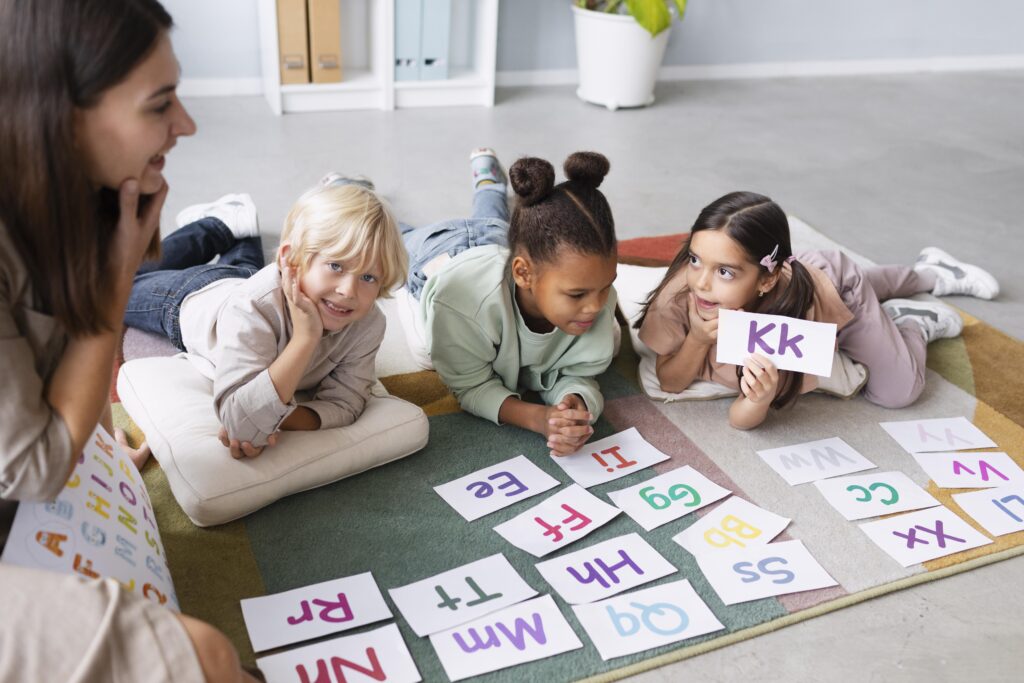
Best Montessori Learning Material At Home Close your eyes for a moment and imagine tracing your finger along the raised, rough surface of a letter. You feel its curves, its angles, the direction it travels. Now imagine doing that dozens of times, day after day, with no pressure — only curiosity and the simple pleasure of touch. By the time you sit down to write that letter, your hand already knows the way. This is the quiet genius of the Montessori Sandpaper Letters — one of the most beloved and effective materials in early childhood education. Simple in appearance, profound in impact, these rough-textured letter tiles have helped generations of children unlock the mysteries of reading and writing in a way that feels entirely natural, unhurried, and joyful. In this blog post, we explore what Sandpaper Letters are, the science behind why they work so powerfully, how to use them at home, and what to expect as your child moves through this remarkable journey to literacy. What Are Sandpaper Letters? Sandpaper Letters are a set of wooden tiles, each featuring a single letter of the alphabet cut out of fine sandpaper and mounted onto a smooth wooden or board background. The consonants are traditionally mounted on blue (or pink) boards and the vowels on red (or pink) boards — a colour distinction that will later help children understand the difference between vowel and consonant sounds. The letters are always presented in their cursive or print form — depending on the school’s approach — and they represent sounds, not letter names. This is a crucial distinction that sets Montessori literacy apart from traditional phonics instruction. Important note: In Montessori, we teach the sound of the letter first — not its name. The letter ‘s’ is introduced as the sound ‘sss’, not as ‘ess’. This makes the leap to blending sounds into words far more intuitive for the child. The Science Behind the Sandpaper Letters Why sandpaper? Why not simply show a child a printed letter on a flashcard or a screen? The answer lies in how the young brain learns — and in particular, how multi-sensory experiences create stronger, more durable memory traces than single-sense experiences. The Three-Pathway Approach Sandpaper Letters engage three distinct learning pathways simultaneously: Visual — the child sees the shape of the letterAuditory — the child hears the sound of the letter from the teacher or parentTactile-Kinesthetic — the child traces the letter with their fingers, feeling its shape and direction When all three pathways fire at the same time, the brain forms a much richer, more deeply encoded memory of the letter. Neuroscientists call this multi-modal encoding — and research consistently shows it produces superior retention compared to single-modal learning. A child who has traced the letter ‘s’ with their fingers thirty times does not need to think about how to write it. The motor memory is already in the hand. The body knows. Muscle Memory and the Writing Hand Every time a child traces a Sandpaper Letter, they are rehearsing the exact motor pattern required to write that letter. The direction, the pressure, the flow — all of it is being deposited into muscle memory long before a pencil is ever introduced. This is why Montessori children often begin writing before they begin reading — a sequence that surprises many parents but makes complete neurological sense. The hand has been preparing quietly all along. Phonemic Awareness Through Sound Alongside the physical tracing, the child hears and repeats the phonetic sound of the letter. This builds phonemic awareness — the ability to hear, identify, and manipulate individual sounds in language — which decades of reading research identifies as the single strongest predictor of early reading success. By connecting sound, sight, and touch simultaneously, the Sandpaper Letters lay a triple foundation for literacy that is both scientifically sound and developmentally appropriate. When to Introduce Sandpaper Letters Most children are ready to begin working with Sandpaper Letters between the ages of three and four, though as with all Montessori materials, the child’s readiness is the true guide — not their age. Signs that your child may be ready include: Showing interest in books, stories, and print in the environment Asking questions about letters or words they see around them Able to sit quietly and focus on a task for several minutes Has developed a good three-finger (pincer) grip through practical life and sensorial work Showing interest in drawing, mark-making, or writing-like activities It is perfectly normal for some children to show readiness at two and a half, and others not until four or five. Both are entirely healthy. Montessori is not a race — it is a journey taken at each child’s own pace. How to Present Sandpaper Letters: The Three-Period Lesson The Sandpaper Letters are introduced using Dr. Montessori’s Three-Period Lesson — a beautifully simple teaching sequence that moves from introduction to recognition to recall. Introduce only two or three letters at a time, beginning with sounds that are phonetically distinct and appear frequently in simple words — such as ‘s’, ‘m’, and ‘a’. Step 1: The First Period — Introduction Hold up the Sandpaper Letter and say the sound clearly and naturally: ‘This is sss.’ Trace the letter with two fingers (index and middle) in the direction of writing, and invite the child to do the same while you repeat the sound together. Step 2: The Second Period — Recognition Lay out two or three letters the child has been introduced to and ask: ‘Can you show me sss?’ The child points to or picks up the correct letter. Vary the activity — ‘Can you put sss on your head? Can you trace sss on the floor?’ Step 3: The Third Period — Recall Point to a letter and ask: ‘What sound is this?’ If the child recalls correctly, celebrate! If not, simply return to Period One — there is no failure, only more time needed. Remember: Keep sessions short, light, and joyful. Five